|
|
|
|
How to Setup a Drip Irrigation System and Automatic TimerI picked this style timer because it was inexpensive, easy to use and I was only watering a few plants on our deck. Last year I use this system to water two hanging baskets and this year I expanded it to water two hanging baskets, two large pots and a container with herbs. This article was originally posted on our blog (mylifeonthedeck.com) but I liked it so much I decided to post it on this site too.
Drip Irrigation System Test: Once the drip irrigation system is connected you need to make sure there are no leaks and the water is flowing correctly to all of your emitters. The best way to do this is turn the faucet on and then set dial "B" (duration) on your irrigation timer to "On". This will start the system. Once the water started you want to check the irrigation timer and connection to the hose to make sure it isn't leaking. If it is leaking you need to tighten the connections and make sure you have a gasket at the connectors. That is the little rubber things that usually fall out that provide a good seal. Next go to connections an make sure the water isn't leaking. This was especially important for us because the irrigation tubing is running along our wooden deck and I didn't want the water leaking on the wood. It's also a waste of water and if it is a big leak you may not get enough water to your plants or you will need to run the system longer so your plants get sufficient water. Now check the emitters or drippers to make sure they are working correctly. You want ensure they are providing enough water but the water isn't shooting outside of your container. I purchased a very cool looking lady bug emitter from Home Depot, but the range was to great for the pot it was in and there was no way to adjust the water flow. I took it back with no problems and got an emitter that I could adjust the flow. Actually, I prefer the adjustable ones now, I can fine the watering for different plant needs.
The basil is in the middle, it needs less water so I thought it best to keep it as far away from the emitters as possible. If this was a round pot I would probably only use one emitter and crank up the water flow. Right now the water is basically dripping out. Drip Irrigation System Flow Test: Once your system is connected you need determine the duration you should water your plants. Each plant will have different watering needs. This will also be determined based on your climate and the style of container your plant is in.
The best time is to run this test when the containers are dry and need to be watered. You can do this as part of the system test above or you can run the test on the following day. For our watering needs to I decided to run the system once a day. Based on your plants and local climate you might want to run it more often. This test is pretty simple:
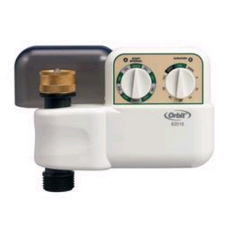
Now you know how long you should run your irrigation timer and system for each day. If you want to run it multiple times in one day you might want to decrease the time. You may also want to increase or decrease the timer based on the time of the year and if it is hotter or wetter than usual. Setting the Irrigation Timer: The details for setting up your irrigation timer might be a different than the Orbit 91600 but they will probably be similar. I set the system to water for 10 minutes once a day.
As you can see it is pretty simple to set it up. If you have a different timer you should read the manufacturer’s instructions before programming the automatic timer. Note the following for the timer I used:
|
|
||||||||||
|
||||||||||||
|
|
||||||||||||


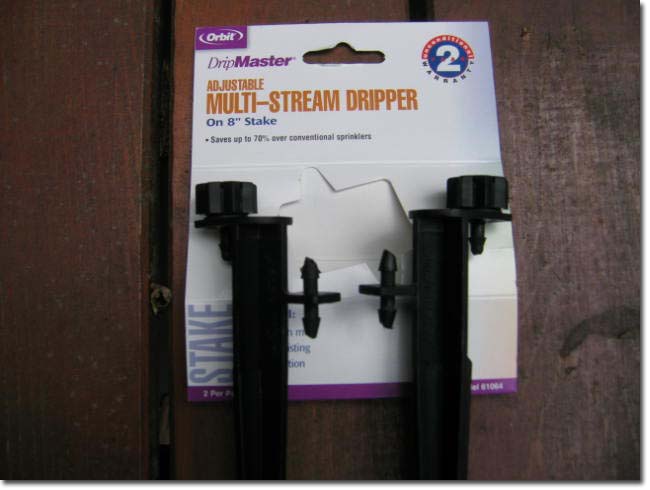 For
the herb container I got a package of two multi-stream stakes. The stakes are
planted into the dirt and you can adjust the height by how deep you bury the
stakes. You can also adjust the flow of the drip by turning the dial on the top.
I have the two stakes connected in-line and used a tee at the first stake to
connect the second one. I had to adjust the two stakes as a system. If I
decreased the water in one it would increase the water in the other one, so I
had to decrease the water in this one. Since the system would be on for all of
the plants for the same length of time I reduced the water as much as possible
for the herb container and maximized the water in the hanging baskets. The
potted plants were in the middle.
For
the herb container I got a package of two multi-stream stakes. The stakes are
planted into the dirt and you can adjust the height by how deep you bury the
stakes. You can also adjust the flow of the drip by turning the dial on the top.
I have the two stakes connected in-line and used a tee at the first stake to
connect the second one. I had to adjust the two stakes as a system. If I
decreased the water in one it would increase the water in the other one, so I
had to decrease the water in this one. Since the system would be on for all of
the plants for the same length of time I reduced the water as much as possible
for the herb container and maximized the water in the hanging baskets. The
potted plants were in the middle.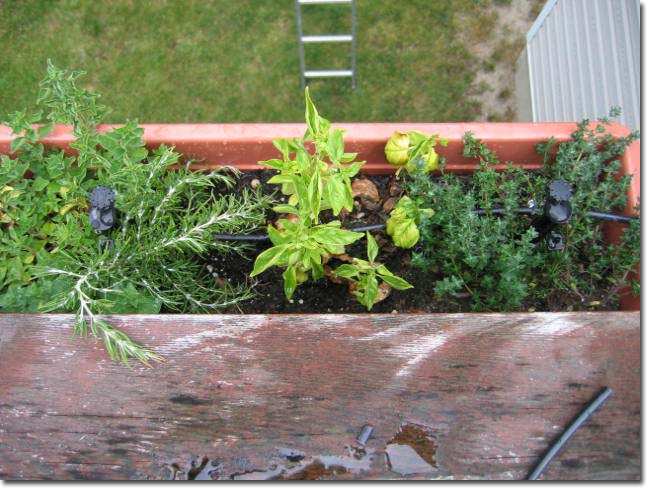 Here
is a picture of the multi-stream stakes installed in the herb container. They
are the black emitters on the left and right side of the container. Left one
beside the rosemary and the right one in the thyme.
Here
is a picture of the multi-stream stakes installed in the herb container. They
are the black emitters on the left and right side of the container. Left one
beside the rosemary and the right one in the thyme.